If you have a group of photos that is photographed as a series, like when making step by step tutorials on how to's, it's easy to optimize your pictures fast and easy with the Actions menu in Photoshop. I've made a tutorial on how to use this menu.
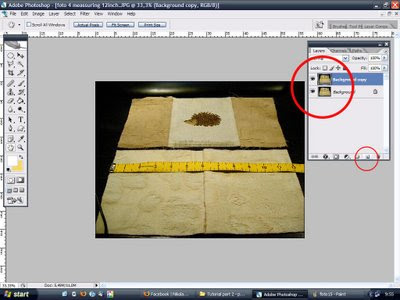
First of all, open a picture from your picture folder in Photoshop,
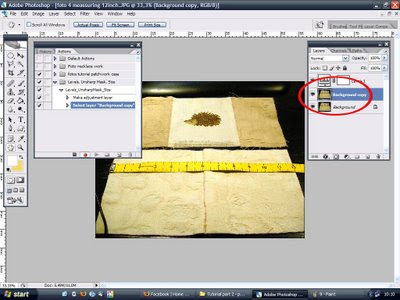
Copy the background image as a safety when making mistakes.
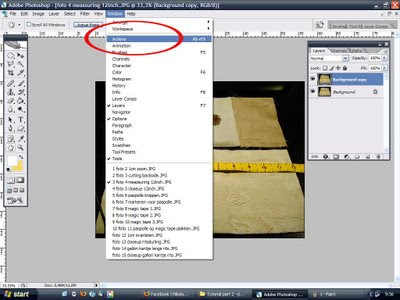
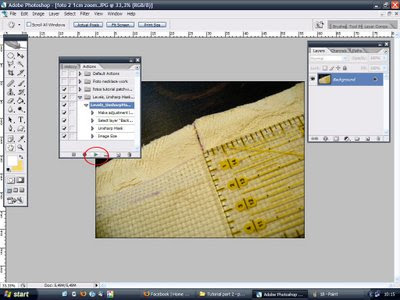
If it isn't allready open, open the Actions menu by choosing it inside the windows tab.
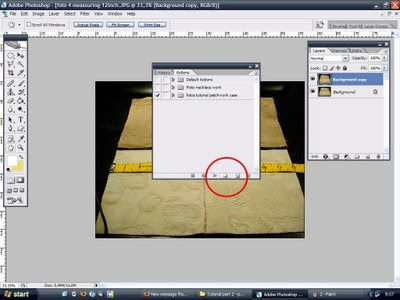
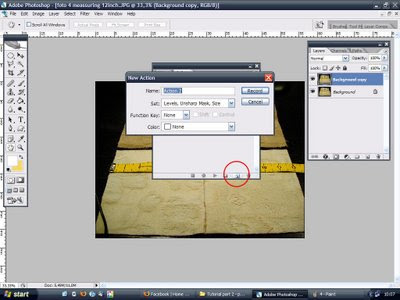
Now you have the Actions menu open, click on the little button in the center of the red circle shown in this picture.
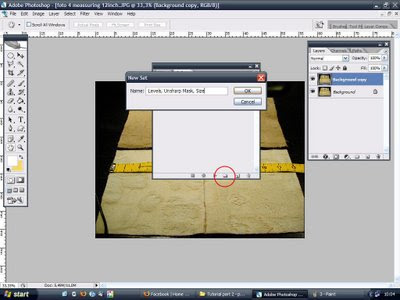
You've just made a new set, inside this set we will put actions, so it's very practical to name your set with a list of these actions. Click OK when you're done.
Now we're creating our first action, click on the 'create new action button' , center of red circle in this picture.
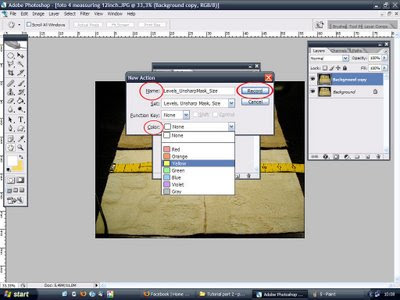
Name your action, in this case 'Levels, UnsharpMask, Size'
I'm gonna first level the picture so the shadows and lights are optimized, I'm gonna use a filter called 'Unsharp Mask' to enhance the details inside the picture, and after that I'm gonna resize the picture to a web friendly 500px width.
You can also choose a color, this is helpful when working with more than one action inside your set. In this case I've recorded all my actions inside one action.
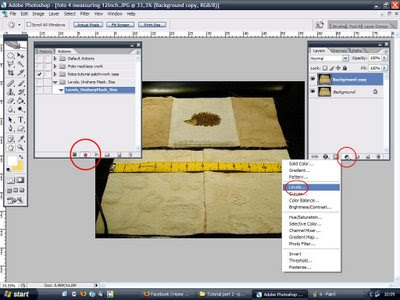
Now the fun part starts.. inside the 'Actions menu' click on the 'record actions' button, the little red dot. After you've done that Photoshop will record every click of your mousebutton! Isn't that cool or what!? So, next click on the 'Adjustment layers' button and choose 'Levels'..
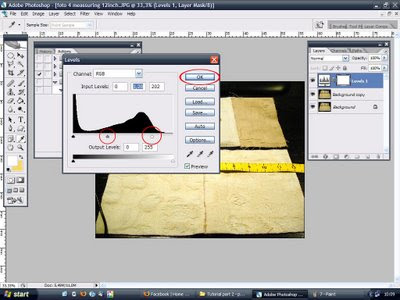
Move the right level and middle level slightly until your picture is optimized.
I like to slightly move the right triangle to the left, the higher the curve the more pixel information is available, if you move the triangle too much to the left, there will be loss on pixel information to the right.. so it's all a matter of finding a satisfying ballance. Midtones (middle triangle) and Hightones (right triangle) are usually the only levels that need to be optimized.
Click OK..
Now click on your background copy so we can apply the Unsharp Mask filter, you don't want that filter unto the Levels Adjustment layer, that would be stupid..
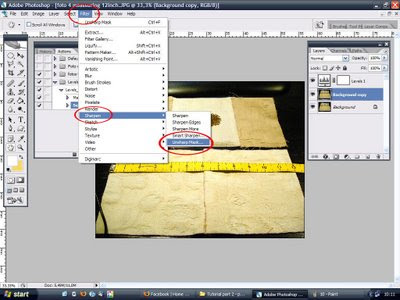
Next choose 'Filters > Sharpen > Unsharp Mask
This is my favorite filter in PS, it takes all the detail of a picture and makes it so much sharper.. It's very useful in pictures with metal, glass, hair, detailed structures like macro pictures of fabric and food.. Anyway, it's pure candy!
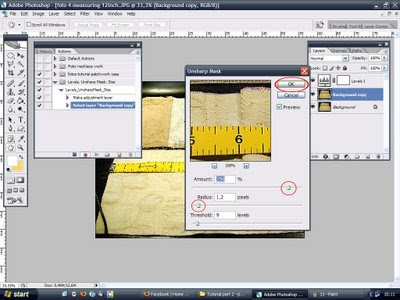
Inside the 'Unsharp Mask' menu, slide the triangles until there is a nice ballance of quality and detail. I've put in my favorite data for Amount and Radius, Treshold I'd like to leave unchanged, because that's messing it up a bit too much.. It's tempting though..
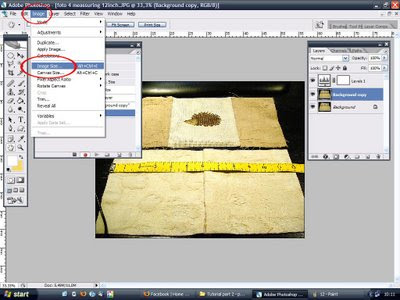
Because changing and optimizing pictures must be done with the largest image file size possible, we're now going to resize the picture so we can use it for the web. Choose Image > Image Size
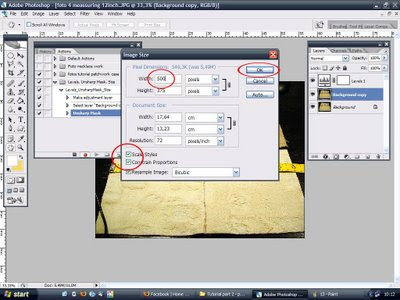
I like to use 500px width for all my blog pictures.. Check if the resize proportions are well set, and click OK!
Now you're almost done with your Action Hero Queste..
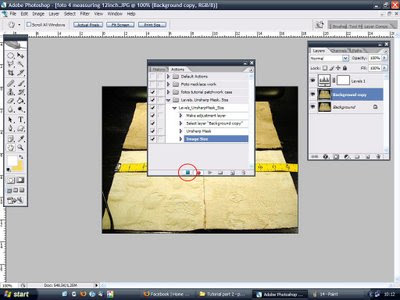
Inside your 'Action menu' click on the 'Stop button' next to the 'Record button'.
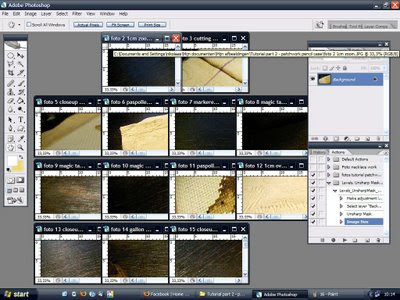
Now open another picture from your picture series..
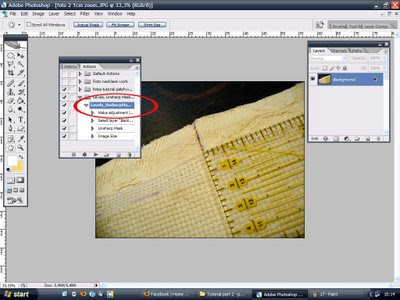
Go inside the 'Actions menu' and click on the first action listed inside your set
Press the 'Play button' at the bottom of the 'Actions menu'.. et voila! Your Action set will be automatically repeat each step you took in this tutorial.
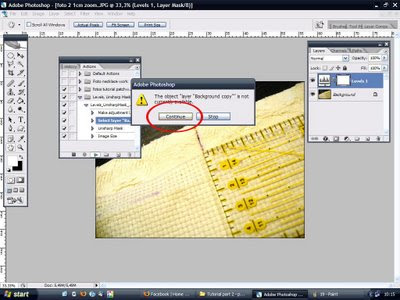
For safety, during the replay of the action you have to confirm a layer copy.. you can always change that during the first steps of recording your actions.. But I like to have a bit of control..
This concludes the tutorial on how to use the Actions menu inside Photoshop..
Back to my hedgehog, he's all covered in glitter at this moment, here's a sneak preview of the second part of the tutorial on making a patchwork pencil case.. or something like that.. :)

How to glitter your crosstitch design without messing it up..
Bye now, and in the meantime, a Spoon Full of Buttons to everyone!

First of all, open a picture from your picture folder in Photoshop,
Copy the background image as a safety when making mistakes.

If it isn't allready open, open the Actions menu by choosing it inside the windows tab.

Now you have the Actions menu open, click on the little button in the center of the red circle shown in this picture.

You've just made a new set, inside this set we will put actions, so it's very practical to name your set with a list of these actions. Click OK when you're done.

Now we're creating our first action, click on the 'create new action button' , center of red circle in this picture.

Name your action, in this case 'Levels, UnsharpMask, Size'
I'm gonna first level the picture so the shadows and lights are optimized, I'm gonna use a filter called 'Unsharp Mask' to enhance the details inside the picture, and after that I'm gonna resize the picture to a web friendly 500px width.
You can also choose a color, this is helpful when working with more than one action inside your set. In this case I've recorded all my actions inside one action.

Now the fun part starts.. inside the 'Actions menu' click on the 'record actions' button, the little red dot. After you've done that Photoshop will record every click of your mousebutton! Isn't that cool or what!? So, next click on the 'Adjustment layers' button and choose 'Levels'..

Move the right level and middle level slightly until your picture is optimized.
I like to slightly move the right triangle to the left, the higher the curve the more pixel information is available, if you move the triangle too much to the left, there will be loss on pixel information to the right.. so it's all a matter of finding a satisfying ballance. Midtones (middle triangle) and Hightones (right triangle) are usually the only levels that need to be optimized.
Click OK..

Now click on your background copy so we can apply the Unsharp Mask filter, you don't want that filter unto the Levels Adjustment layer, that would be stupid..

Next choose 'Filters > Sharpen > Unsharp Mask
This is my favorite filter in PS, it takes all the detail of a picture and makes it so much sharper.. It's very useful in pictures with metal, glass, hair, detailed structures like macro pictures of fabric and food.. Anyway, it's pure candy!

Inside the 'Unsharp Mask' menu, slide the triangles until there is a nice ballance of quality and detail. I've put in my favorite data for Amount and Radius, Treshold I'd like to leave unchanged, because that's messing it up a bit too much.. It's tempting though..

Because changing and optimizing pictures must be done with the largest image file size possible, we're now going to resize the picture so we can use it for the web. Choose Image > Image Size

I like to use 500px width for all my blog pictures.. Check if the resize proportions are well set, and click OK!
Now you're almost done with your Action Hero Queste..

Inside your 'Action menu' click on the 'Stop button' next to the 'Record button'.

Now open another picture from your picture series..

Go inside the 'Actions menu' and click on the first action listed inside your set

Press the 'Play button' at the bottom of the 'Actions menu'.. et voila! Your Action set will be automatically repeat each step you took in this tutorial.

For safety, during the replay of the action you have to confirm a layer copy.. you can always change that during the first steps of recording your actions.. But I like to have a bit of control..
This concludes the tutorial on how to use the Actions menu inside Photoshop..
Back to my hedgehog, he's all covered in glitter at this moment, here's a sneak preview of the second part of the tutorial on making a patchwork pencil case.. or something like that.. :)

How to glitter your crosstitch design without messing it up..
Bye now, and in the meantime, a Spoon Full of Buttons to everyone!
Comments
Post a Comment